What Causes an Ice Maker to Stop Working? Troubleshooting Tips

What causes an ice maker to stop working?

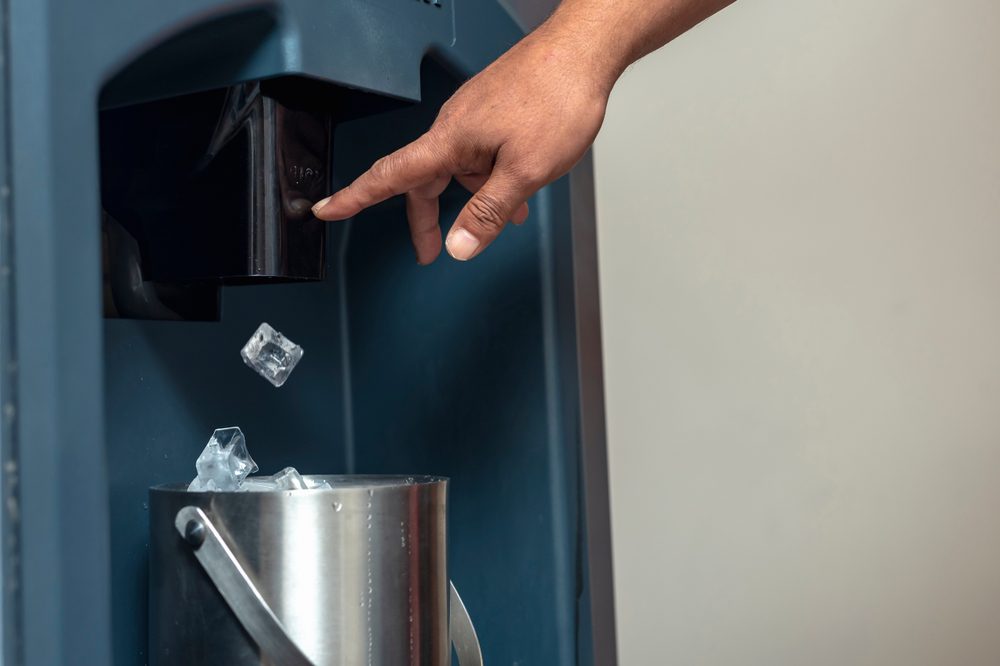
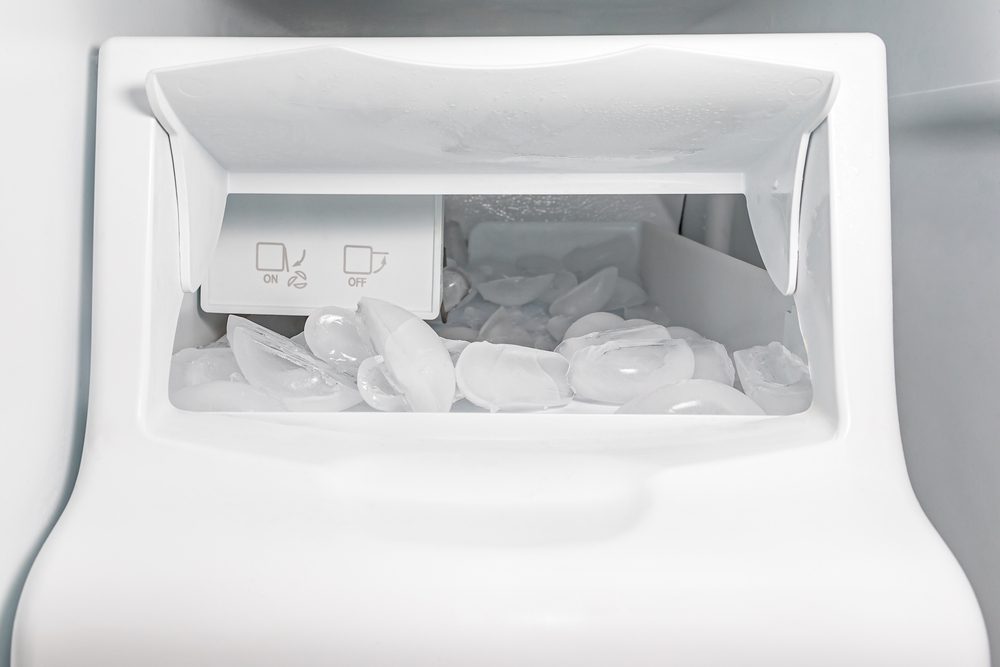
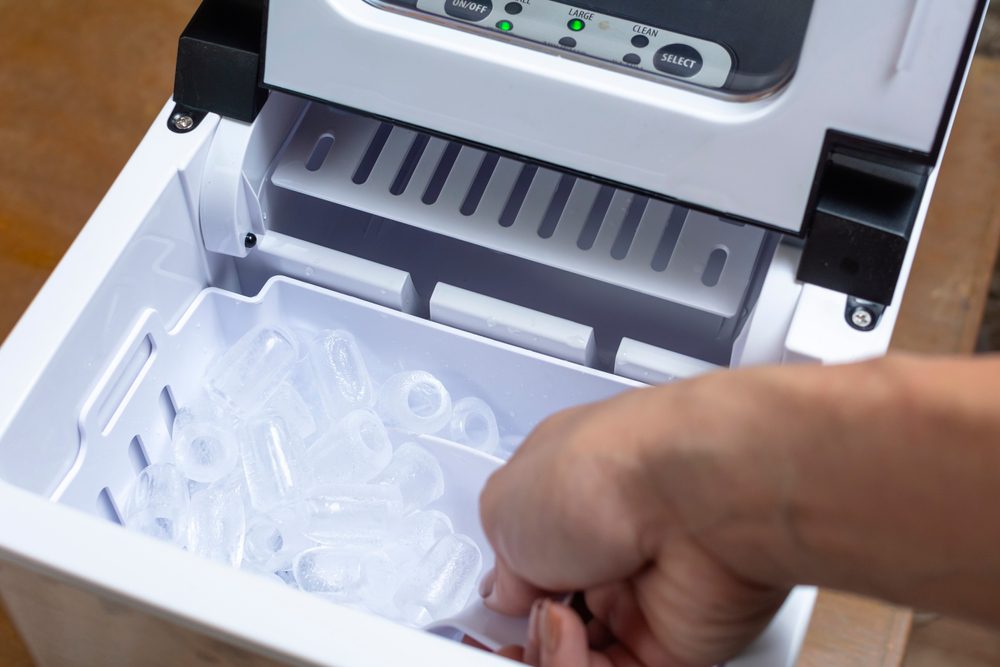
An ice maker is one of those modern conveniences you don’t think about—until it stops working.

But what causes an ice maker to stop working?

Before assuming the worst, there are a few things you can check that might get it back up and running without calling in a repair.

Common Reasons Your Ice Maker Isn’t Producing Ice

If your ice maker has decided to take an unscheduled break, don’t panic. The issue is often simple and easy to fix.

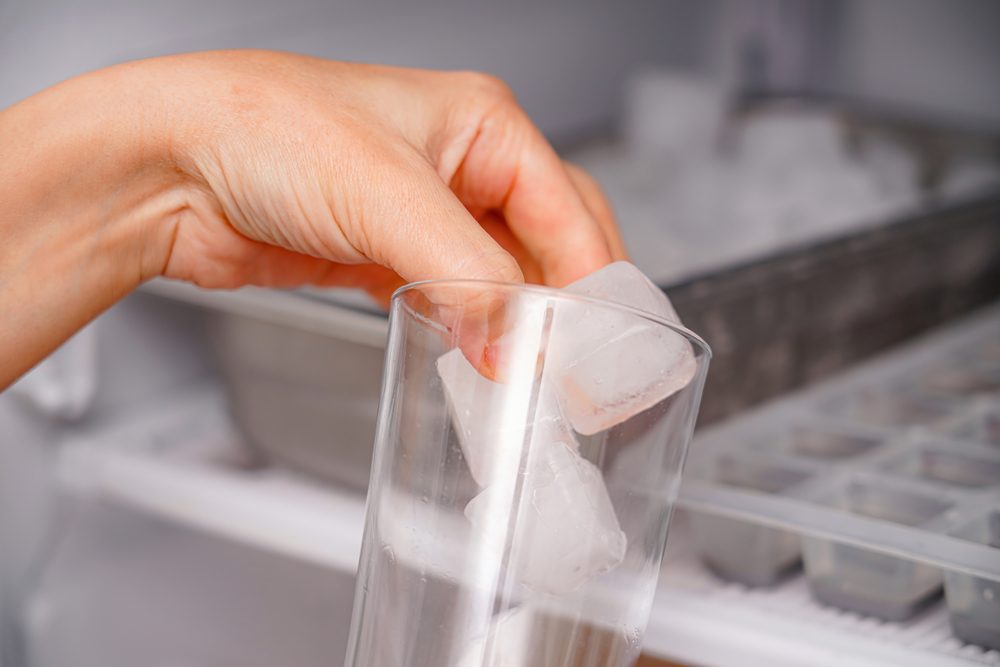
1. The Water Supply is Blocked

No water, no ice—plain and simple. If your ice maker isn’t making ice, check if the water line is kinked, frozen, or clogged. Sometimes, mineral deposits can build up, preventing proper water flow.

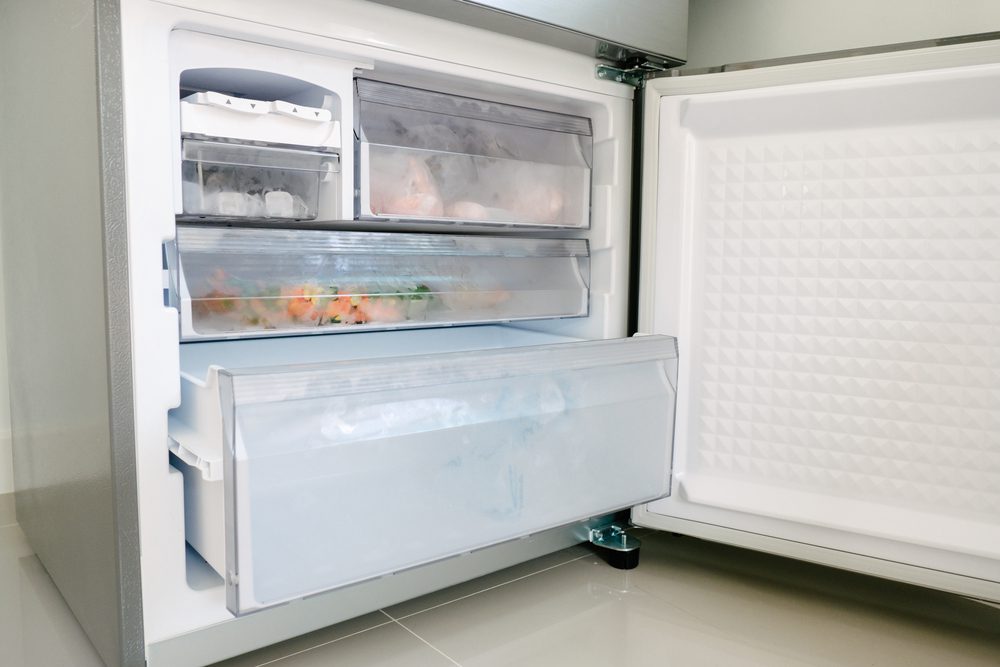
2. The Freezer Temperature is Too High

Ice makers operate best when the freezer is at or below 0°F (-18°C). If the temperature is too high, the ice maker might not freeze water properly. A quick fix? Adjust the thermostat and make sure nothing is blocking the vents.

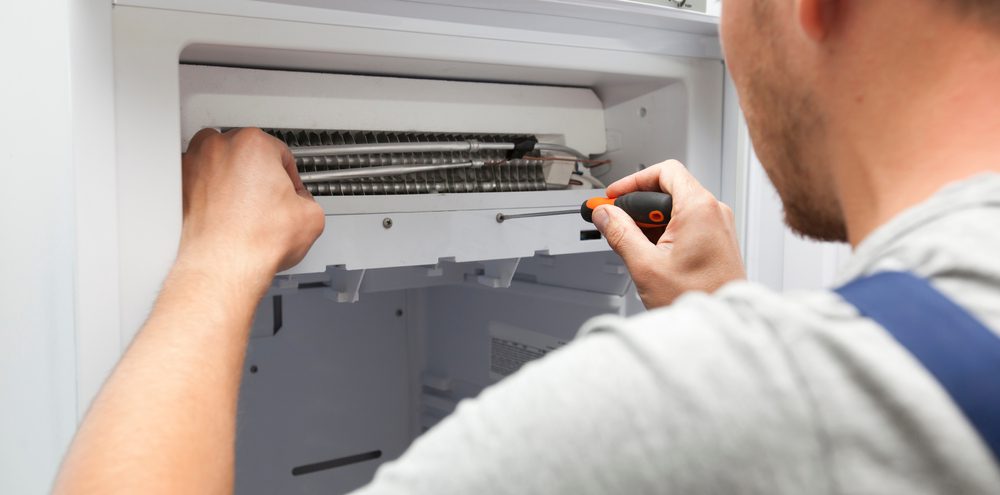
3. The Ice Maker’s Arm is Stuck

Most ice makers have a small metal or plastic arm that signals when to stop making ice. If it gets stuck in the “off” position, the machine won’t cycle. Gently push it down to see if that restarts the process.

What can cause an ice maker to stop working?

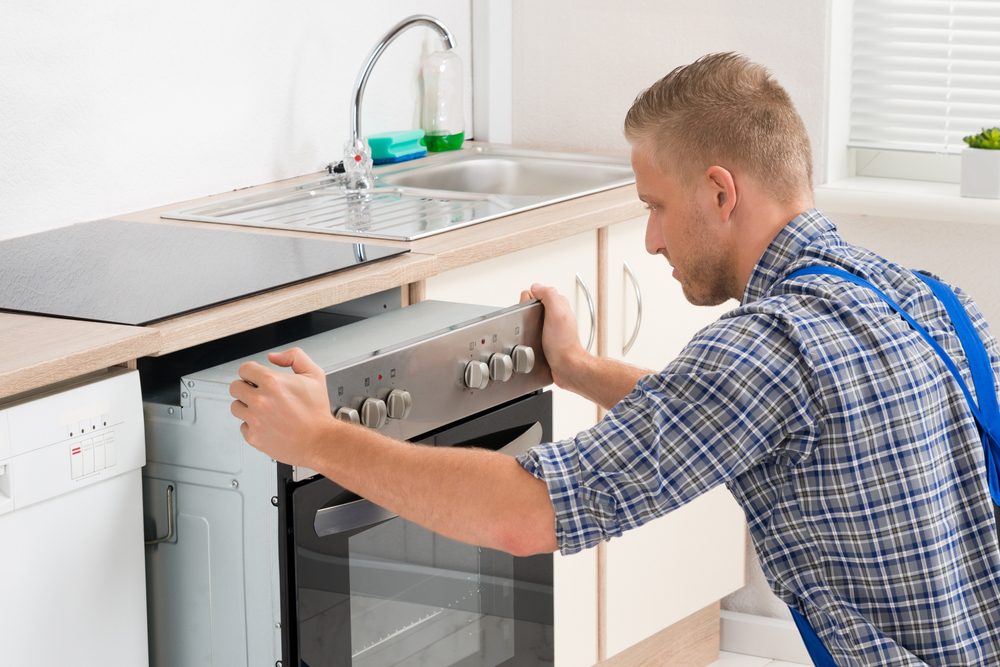
Electrical and Mechanical Issues That Can Stop Ice Production

If the basics check out and you’re still facing trouble, you might be dealing with something more technical.

1. Faulty Water Inlet Valve

The water inlet valve controls water flow to the ice maker. If it’s defective or clogged, the machine won’t get the water it needs. Replacing it might be necessary, but testing it with a multimeter first can confirm if it’s the culprit.

2. A Clogged or Dirty Filter

Most modern refrigerators have a water filter, and if it’s overdue for a change, water flow can be restricted. Check the manual for replacement recommendations—most filters need changing every six months.

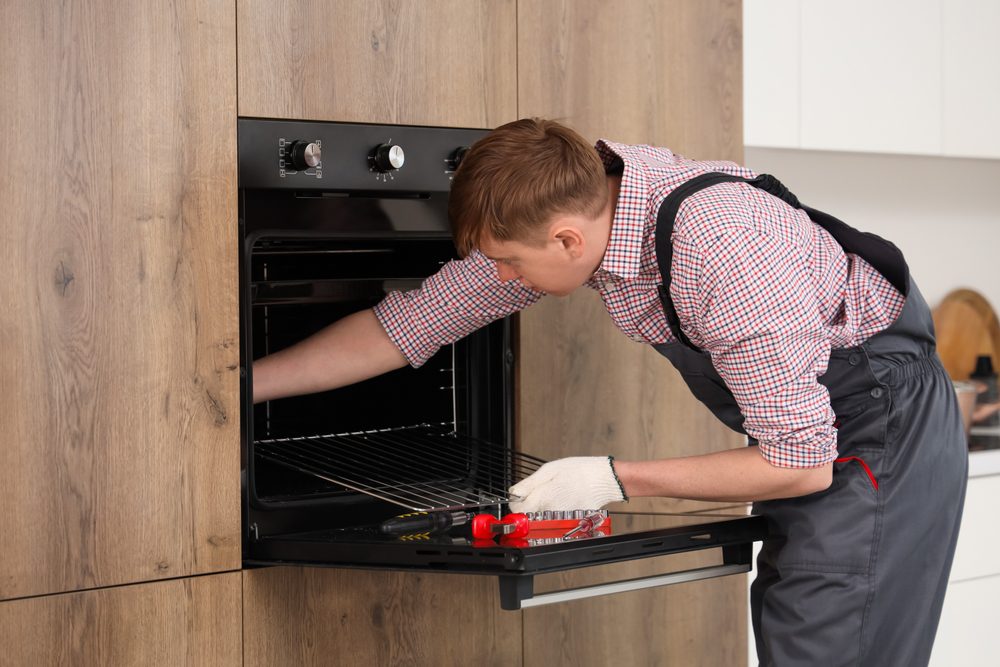
3. A Broken Ice Maker Motor or Module

If everything else is functioning correctly, but your ice maker still isn’t working, a faulty motor or control module might be the issue.

These components control the ice-making cycle, and if they fail, the unit won’t produce ice. At this point, professional repair might be your best bet.

Ready to Get Your Ice Maker Fixed?

If you’ve checked everything and still can’t figure out what caused your ice maker to stop working, it might be time to call in the experts.

A Tech Repair Inc. specializes in diagnosing and fixing appliance issues quickly and efficiently.

Whether it’s a clogged water line, a faulty motor, or something in between, we’ll get your ice maker working again in no time.

Need help? Contact A Tech Repair Inc today and get back to enjoying ice-cold drinks without the hassle!

Why Would a Freezer Stop Working? Common Issues & Solutions

Why would a freezer stop working?

A fully functional freezer is something most people take for granted—until it stops working. Suddenly, your frozen foods are at risk, and you’re left wondering, why would a freezer stop working?

While it may seem like a major problem, many freezer failures stem from common, fixable issues. Understanding the cause can help you determine whether you need a simple DIY fix or a professional freezer repair.

1. Power Supply Problems

Before panicking, check the basics. Is the freezer plugged in securely? Did a circuit breaker trip?

Sometimes, a loose plug or power surge can disrupt the electricity supply, making it look like the freezer is broken when it’s not. If your freezer has an indicator light, see if it’s on.

If the outlet works for other appliances but not the freezer, the issue could be internal.

2. Dirty or Faulty Condenser Coils

Freezers rely on condenser coils to release heat, but when they get covered in dust and debris, they struggle to work efficiently.

This can cause the freezer to overheat and stop cooling properly. Cleaning the coils with a vacuum or coil brush every six months can prevent this problem. However, if the coils are damaged, they may need replacement.

3. Malfunctioning Thermostat

A faulty thermostat can lead to inconsistent cooling or even a complete shutdown.

If the freezer isn’t as cold as it should be, try adjusting the thermostat. If there’s no response, it might need recalibration or replacement.

A simple way to test the thermostat is by turning it to the coldest setting and listening for a click—if there’s silence, it may be broken.

Why did your freezer stop working?

4. Evaporator Fan Issues

The evaporator fan is responsible for circulating cold air inside the freezer. If it stops working, you’ll likely notice that some sections remain cold while others start thawing. 

A noisy or silent fan motor is a red flag. If the blades are obstructed by ice buildup, defrosting the freezer may solve the problem. If the fan motor itself has failed, it will need to be replaced.

5. Seals and Gaskets Letting Warm Air In

A freezer door that doesn’t seal properly allows warm air inside, leading to frost buildup and temperature fluctuations. Inspect the rubber gasket around the door—if it’s cracked, loose, or covered in grime, it won’t seal correctly.

Cleaning it with warm water and mild soap might help, but if it’s damaged, replacing it is the best solution.

6. Refrigerant Leak or Compressor Failure

If the freezer isn’t cooling despite running continuously, there could be a refrigerant leak or compressor failure.

These are more complex issues that require professional attention. Refrigerant leaks reduce cooling efficiency, while a failing compressor can cause the entire system to stop working. In both cases, an expert diagnosis is recommended.

Time to Call the Pros? A Tech Repair Inc Can Help!

If you’ve checked the common issues and your freezer still isn’t working, it’s time to bring in an expert.

A Tech Repair Inc. specializes in diagnosing and repairing freezer issues quickly and efficiently.

Contact us today to get your freezer back to peak performance!

Should I Repair or Replace My Stove? Key Factors to Consider

Should I repair or replace my stove?

A stove is one of those appliances you don’t think about—until it stops working. And when it does, you’re left asking the big question: should you repair or replace your stove?

The answer isn’t always straightforward. Some appliance repair problems have quick, affordable fixes, while others signal it’s time to start shopping for a new one.

Let’s break it down so you can make the best decision for your kitchen (and your wallet).

The Age of Your Stove Matters

Like all appliances, stoves have a lifespan. Gas stoves typically last 15 years, while electric ones average around 13 years. If yours is approaching (or surpassing) these numbers and constantly breaking down, replacement might be the better option.

However, if it’s under ten years old and this is its first major issue, a stove repair could buy you plenty more years of use.

The Cost of Repairs vs. Replacement

A good rule of thumb: if a repair costs more than 50% of the price of a new stove, replacement is the smarter choice.

Here’s a quick guide to average repair costs:

  1. Igniter issues: $150 – $300
  2. Broken burners: $100 – $400
  3. Faulty control board: $200 – $600
  4. Gas leaks (urgent!): Often better to replace the stove for safety reasons

If your stove is still in good shape and the repair is minor, it’s usually worth fixing. But if you’re looking at several hundred dollars in repairs—or multiple issues piling up—it’s time to start shopping for a new one.

Are you thinking about repairing or replacing your stove?

Performance and Efficiency Considerations

Even if your stove is still technically working, is it working well? Older models often have uneven heating, longer preheat times, or burners that don’t function like they used to. Plus, newer stoves are more energy-efficient, which can lead to long-term savings on your utility bills.

If your stove is struggling to keep up with your cooking needs, should you repair or replace your stove?

In many cases, an upgrade will save you money and frustration in the long run.

Safety Should Always Come First

A faulty stove isn’t just an inconvenience—it can be dangerous. Gas leaks, electrical issues, or frequent sparking are serious concerns that require immediate attention.

If your stove poses a safety risk, don’t hesitate. Have a professional inspect it, and if repairs are too costly or unreliable, replacing it is the safest choice.

Final Verdict: Repair or Replace?

Still unsure? Here’s a simple way to decide:

Repair if: The stove is under ten years old, the repair cost is reasonable, and it still performs well.
Replace if: Repairs are too expensive, performance is declining, or safety is a concern.

If you’re dealing with a broken stove and need expert advice, A Tech Repair Inc can help.

Our technicians provide fast, reliable repairs so you can get back to cooking without the stress.

Contact us today to schedule a service!


How to Repair an Oven Door: DIY Fixes for Common Issues

How to repair oven door?

An oven door that won’t close properly, has a loose handle, or features a cracked glass panel isn’t just annoying—it’s a safety hazard. The good news? Many of these issues can be fixed at home with the right tools and a little patience.

Whether your oven door is misaligned, not sealing correctly, or has a damaged hinge, this guide will walk you through repairing an oven door with simple DIY solutions. And if you still don’t manage to repair it on your own, A Tech Repair Inc. is here to help!

1. Fixing a Loose or Broken Handle

A wobbly oven door handle can make opening and closing the oven a hassle. It’s usually caused by screws that have come loose over time. Here’s how to fix it:

What You’ll Need:

  1. A screwdriver (Phillips or flathead, depending on your oven)
  2. Replacement screws (if necessary)

Steps:

  1. Open the oven door and locate the screws securing the handle—these are usually on the inside of the door.
  2. Tighten the screws carefully. If they’re stripped or missing, replace them with new ones of the same size.
  3. Close the door and test the handle to ensure it’s secure.

If the handle is damaged beyond repair, you may need to order a replacement from the manufacturer and get a proper solution for your oven repair.

2. Fixing a Door That Won’t Close Properly

An oven door that won’t shut all the way can lead to heat loss and uneven cooking. The culprit is usually either worn-out hinges or a faulty door gasket.

Checking the Hinges:

  1. Open the door and inspect the hinges for visible damage or misalignment.
  2. If they look bent, try adjusting them with pliers.
  3. If the hinges are broken, you’ll need to replace them with new ones from your oven’s manufacturer.

Replacing the Door Gasket:

  1. The gasket is the rubber seal around the oven door. If it’s cracked or loose, heat can escape.
  2. Gently pull out the old gasket and push the new one into place, ensuring it’s evenly positioned.

After these fixes, try closing the door again. If it seals tightly, the problem is solved!

Can you learn how to repair an oven door?

3. Replacing Cracked or Shattered Oven Glass

If the glass panel on your oven door is cracked, don’t wait to replace it—continued use can cause the glass to shatter completely.

What You’ll Need:

  1. A replacement oven glass panel (specific to your model)
  2. A screwdriver

Steps:

  1. Remove the oven door by unlocking the hinges (check your user manual for guidance).
  2. Lay the door flat on a soft surface to prevent scratches.
  3. Unscrew and remove the inner panel to access the damaged glass.
  4. Carefully remove the broken glass and insert the replacement panel.
  5. Reassemble the door, secure all screws, and reattach it to the oven.

Make sure the door is properly aligned before using the oven again.

Need Professional Help? A Tech Repair Inc. Has You Covered!

Some oven door issues, like complex hinge repairs or electronic malfunctions, require expert attention.

If your DIY fix didn’t go as planned, or you just don’t have the time, A Tech Repair Inc. offers professional appliance repair services to get your oven working like new. 

Contact us today for fast, reliable service!

What Oven Do I Have? Tips to Identify Your Oven Model

What oven do I have?

Knowing what oven model do you have might seem like a small detail, but it’s more important than you think. Whether you’re looking for replacement parts, troubleshooting advice, or the right user manual, identifying your oven can save you time and hassle.

Here’s a simple guide to help you figure out your oven’s make and model with ease.

Start with the Manufacturer’s Label

The easiest way to identify your oven is to check the manufacturer’s label. These labels are often found in places you might not think to check, like inside the oven door, on the back panel, or around the control panel.

Once you find the label, you’ll see important details like the brand name, model number, and serial number. If it’s in a hard-to-reach spot, try using your smartphone’s camera or a flashlight to make it easier to see.

Check Your User Manual or Original Packaging

If you can’t access the label or it’s too faded to read, your oven’s user manual is your next best bet. Most manuals list the model number and key details right on the first few pages. Don’t have the manual anymore?

No problem—check the original packaging if you still have it. Many manufacturers print the model number on the box. It’s a simple step that’s often overlooked in the rush to solve a problem.

How can I recognize what oven do I have?

Explore Digital Displays or Settings Menus

If you have a modern oven with a digital display, you might be able to find the model information right on the screen. Check the settings menu for an “About” or “Info” section, which may include details like the model number or software version.

This trick is especially useful for newer, tech-savvy ovens. Keep in mind, though, that this step won’t work for older or more basic models.

Search Online Using Key Features

If you’re still unsure, take a closer look at your oven’s design and features. Use descriptive search terms like, “black double oven with digital controls” or “stainless steel single oven with knobs” to narrow down your options online.

You can also snap a photo of your oven and compare it to images from manufacturer websites or appliance retailers. This is especially helpful for popular brands and designs.

Reach Out to the Manufacturer or a Professional

If all else fails, don’t hesitate to ask for help. Contact the oven’s manufacturer and provide any details you have, such as the purchase date, visible features, or even a photo of the appliance.

Their customer service team usually identifies the model quickly. Alternatively, a professional oven repair technician can determine the make and model of your oven. 

This is often the fastest and easiest solution, especially if you’re dealing with an urgent repair.

Get Your Oven Back on Track

Identifying your oven model doesn’t have to be stressful. By following these simple steps, you can quickly figure out what oven you have. Once you know the model, you’ll be ready to handle repairs, find the right parts, or simply learn more about your appliance.

Our professional team at A Tech Repair Inc is here to help if you’re unsure or need expert assistance. 

Whether it’s identifying your oven or performing a repair, you can count on us for reliable and efficient service. Contact us today to get started!

How Often Do Freezers Run? Understanding Energy Efficiency & Usage

How often do freezers run?

Freezers don’t run continuously but instead cycle on and off to maintain the right temperature. Understanding these cycles and how often freezers run can help you improve energy efficiency, troubleshoot problems, and avoid unnecessary repairs.

Let’s explore what affects freezer cycles and how you can keep yours running smoothly.

How Freezer Cycles Work


Freezers operate in cycles to keep a consistent temperature. The compressor kicks in to cool things back down when the inside temperature rises above the set level. Once the ideal temperature is reached, the compressor shuts off until it’s needed again.

On average, freezers run for about 30 minutes to an hour per cycle, depending on the model. These cycles typically add up to about 12-16 hours of runtime per day. 

However, this can vary based on factors like the environment, the freezer’s condition, and how often it’s used.

Factors That Affect How Often Freezers Run

Several factors can influence how frequently and how long your freezer cycles:

  • Ambient Temperature: Freezers in warm environments, like garages, have to work harder to maintain their temperature. Cooler surroundings result in less frequent cycling.
  • How Often You Open It: Every time you open the freezer, warm air enters, and the compressor has to work to cool it back down.
  • What’s Inside: A full freezer runs more efficiently because frozen items help keep the temperature stable. An empty freezer cycles more often as it tries to maintain the cold air.
  • Door Seal Condition: Worn or leaky seals allow warm air to seep in, causing the compressor to run longer and more often.

How Often Should a Freezer Run?


In general, freezers cycle on and off throughout the day, running about 12-16 hours total to maintain a consistent temperature of 0°F (-18°C), which is ideal for preserving food.

If your freezer seems to be running constantly, it may indicate a problem. Common issues include dirty condenser coils, a faulty thermostat, or poor ventilation. Take some time to observe your freezer’s cycles. If it seems to run more frequently or for longer than usual, it’s worth investigating further.

How an Ice Maker Works: A Look Inside Your Appliance

How ice maker works?

There’s nothing better than having a constant supply of ice at your fingertips, especially during a hot day or when hosting guests. 

Understanding your ice maker can help you maintain it better, troubleshoot issues, and appreciate the technology that keeps things cool.

Let’s take a closer look at how ice maker works and how it creates perfect ice cubes every time!

Step-by-Step: How Ice Maker Works

Step 1: Water Supply and Filtration


It all starts with water. Your ice maker pulls water directly from your home’s supply line, which is connected to the refrigerator.

Before the water flows into the ice maker, it often passes through a filter to remove impurities. Clean water ensures your ice is clear, tastes fresh, and stays free of unwanted particles.

Step 2: The Ice Mold and Cooling Process

Once the water reaches the ice mold, the real magic happens. The ice mold consists of small trays where the water is evenly distributed. Your refrigerator’s cooling system freezes the water in these trays by circulating cold air or through refrigeration coils. 

Sensors monitor the temperature, ensuring the water freezes completely without overworking the appliance.

Step 3: Harvesting the Ice

When the water has turned into solid ice cubes, the ice maker gets to work.

A small heating element activates to warm the base of the ice mold. This loosens the ice, making it easy to eject. The machine’s motor then gently pushes the cubes into the storage bin below, where they’re ready for you to grab.

Step 4: Repeating the Cycle

Once the ice drops into the bin, the process begins again. Sensors check the bin’s level to prevent overproduction, ensuring your ice maker produces just the right amount to meet your needs.

This automated cycle repeats throughout the day, keeping your ice supply steady without any effort on your part.

Discovering how ice maker works.

Common Components That Make It Happen

Several key parts work together seamlessly to produce ice:

  • Water Inlet Valve: Controls the flow of water into the ice maker.
  • Ice Mold: Holds the water and shapes the ice cubes.
  • Thermostat or Sensor: Monitors the freezing temperature.
  • Heating Element: Loosens the ice from the mold.
  • Storage Bin: Collects the ice cubes until you need them.

When these components work correctly, you get clean, ready-to-use ice.

Why Your Ice Maker Might Stop Working

Despite its efficiency, an ice maker can sometimes run into issues. If your ice maker isn’t producing ice, here are a few common culprits:

  • Clogged Water Filters: Over time, filters can become blocked and restrict water flow.
  • Faulty Water Supply Line: Leaks or blockages in the supply line can stop water from reaching the mold.
  • Malfunctioning Sensors: A faulty thermostat or sensor can disrupt freezing and harvesting cycles.
  • Ice Build-Up: Excess ice can jam the ejection mechanism, preventing new cubes from forming.

If you notice any of these issues, addressing them quickly and getting the ice maker repaired done by a professional can help avoid bigger problems down the line.

Keep Your Ice Maker Running Smoothly

To keep your ice maker working efficiently, follow these simple tips:

  • Replace your water filter regularly.
  • Clean the ice maker and storage bin to prevent residue build-up.
  • Check the water line for leaks or clogs.
  • Schedule routine inspections to catch potential issues early.

With just a little maintenance, you’ll ensure your ice maker continues to deliver fresh, clean ice whenever you need it.

Enjoy Perfect Ice Every Day – Let the Experts Help

Now that you know how ice maker works, it’s easy to see how important proper maintenance is to keep things running smoothly. If your ice maker isn’t performing as it should, don’t let it disrupt your day.

Contact A Tech Repair Inc. for professional ice maker repairs and maintenance.

Our team will get your appliance back to perfect working order so you can enjoy an uninterrupted supply of ice!

How Much Does Appliance Repair Cost? A Breakdown of Common Repairs

How much is appliance repair?

Appliances are essential to keeping your home running smoothly, but when they break down, you’re often left wondering how much it will cost to fix them. 

Understanding how much is appliance repair can help you plan ahead, budget properly, and decide whether it’s worth fixing or replacing it.

Let’s break down the factors, common repairs, and how you can save money.

Factors That Influence Appliance Repair Costs

Several factors determine how much you’ll spend on appliance repairs:

  • Type of Appliance: The repair cost varies depending on whether it’s a refrigerator, oven, washer, or another appliance. Bigger and more complex appliances often cost more to fix.
  • Nature of the Problem: Minor issues, like a clogged drain or broken belt, are less expensive than major problems, like a compressor failure or motor replacement.
  • Parts and Labor: Repairs often include replacement parts and the technician’s labor cost. Some specialized parts can increase the overall bill.
  • Age and Brand of Appliance: Older appliances may need parts that are harder to find, while newer or luxury brands sometimes require specialized expertise or components.

Common Appliance Repairs and Their Costs

Here’s a breakdown of common appliances and their typical repair costs:

  • Refrigerator Repairs: Refrigerators are one of the most frequently serviced appliances. Common issues include faulty compressors, leaking water lines, or broken ice makers. On average, repairs range from $150 to $1,000, depending on the complexity of the problem.
  • Washing Machine Repairs: When a washing machine breaks, you might deal with a faulty drain pump, damaged belt, or a malfunctioning motor. Most washing machine repairs fall between $100 and $500.
  • Dishwasher Repairs: Dishwashers can experience clogged drains, heating element failures, or leaking seals. Repairing these issues typically costs between $150 and $400.
  • Oven and Stove Repairs: For ovens and stoves, problems often include broken heating elements, gas line issues, or control panel failures. You can expect to spend anywhere from $100 to $600 for these repairs.
  • Dryer Repairs: Dryers frequently experience problems like broken belts, faulty heating elements, or drum malfunctions. These repairs generally cost between $100 and $450.

While these are average price ranges, actual costs can vary depending on your appliance’s brand, model, and the technician’s rates.

Learn how much is appliance repair.

Is It Worth Repairing or Replacing Your Appliance?

When faced with a repair, it’s important to ask yourself whether fixing the appliance makes financial sense. A general rule of thumb is: if the repair cost exceeds 50% of the price of a new appliance, replacement might be the better option.

Also, consider the appliance’s age. For example:

  • Refrigerators last about 10–15 years.
  • Washing machines and dryers can run for 8–12 years.
  • Dishwashers and ovens typically last 9–15 years.

If your appliance is nearing the end of its life span, investing in a new one may save you money in the long run.

Save Money with Preventive Maintenance

One of the best ways to avoid costly repairs is through regular maintenance. Simple tasks like cleaning filters, inspecting for leaks, and checking hoses can prevent small issues from turning into major repairs.

Schedule periodic professional inspections to catch problems early and keep your appliances running efficiently. This proactive approach can significantly reduce your spending on future repairs.

Affordable Repairs You Can Rely On

Now that you have a better idea of how much is appliance repair, it’s clear that repair costs can vary widely. If your appliance breaks down, don’t stress. Professional, reliable, and affordable repairs at A Tech Repair are just a call away.

Contact us today for transparent pricing and expert solutions that keep your appliances running like new.

Don’t wait—let the experts save you time, money, and hassle!

Is It Worth Repairing a Stove? Cost vs. Benefit Analysis

Is it worth repairing a stove?


A stove is one of the most essential appliances in your home, keeping your meals warm and your kitchen functional. But when it breaks down, is it worth repairing a stove or should you replace it instead?

This decision often comes down to balancing costs, benefits, and practicality.

Let’s explore how to make the right choice for your needs.

Common Stove Issues and Repair Costs

Stoves, like any other appliance, aren’t immune to wear and tear. Some of the most common issues you might face include burners not heating properly, fluctuating temperatures, or electrical glitches.

Repair costs can vary widely depending on the problem, often ranging between $50 and $400.

Now, consider the cost of a new stove, which typically starts at around $400 and can go well over $2,000 for high-end models.

To simplify the decision, many professionals suggest the “50% rule”: if the cost of repairs is more than half the price of a new stove, replacing it may be the smarter option.

Benefits of Stove Repairs

When the stove repair costs are reasonable, fixing your stove can be a great decision. 

Small issues like a faulty burner or a broken switch often require quick and affordable repairs, saving you the headache of shopping for a new appliance.

Plus, repairing rather than replacing contributes to environmental sustainability by reducing electronic waste.

Stove repairs can also extend the lifespan of your appliance, allowing you to get a few more reliable years out of it. This means you save money in the short term while maximizing the value of your initial investment.

Learn if is it worth repairing a stove.

When to Replace Instead of Repair

However, there are times when replacing your stove makes more sense. If you’re dealing with frequent breakdowns or a major issue like a malfunctioning control board, repairs might become an endless money pit.

Older stoves with outdated features or poor energy efficiency are also strong candidates for replacement.

Upgrading to a modern, energy-efficient stove can save you money on utility bills in the long run. Many new models come with advanced features, such as smart controls and faster heating elements, which can improve your cooking experience.

Key Considerations in Making Your Decision

To decide whether repairing or replacing your stove is the best option, weigh a few key factors.

Start with the cost of the repair itself. Is it affordable, or would that money be better spent on a new appliance? Next, consider the age of your stove. If it’s been serving you for over a decade, replacement might offer better value.

Finally, think about energy efficiency—older stoves tend to consume more power, costing you more over time.

When in doubt, consulting a professional repair service can help you make an informed choice.

A Reliable Partner for Stove Repairs

If you’re still wondering if it is worth repairing a stove, you don’t have to figure it out alone.

A Tech Repair Inc. specializes in diagnosing stove issues and helping you determine the best course of action.

Contact A Tech Repair Inc. today and let our team guide you toward a cost-effective solution that fits your needs.

Oven Repair or Replace? How to Decide on the Best Option

Oven repair or replace?

Your oven is a key player in your kitchen, making everything from family dinners to holiday treats possible. But when it starts acting up, you’re faced with a tricky decision: oven repair or oven replacement?

Deciding which option is best depends on the severity of the problem, the cost of repairs, and how old your oven is.

Let’s break it all down so you can make an informed choice.

Common Oven Issues and Repair Costs

Ovens can run into a variety of problems, some minor and others more serious.

You might notice uneven heating, a door that doesn’t seal properly, or issues with the control panel. Electrical malfunctions and faulty heating elements are also common culprits.

Fixing these issues can cost anywhere from $100 to $600, depending on the severity. 

Repairs can be quick and inexpensive for minor fixes like a broken seal or faulty burner. But if the issue is more complex, like a damaged control board, the costs can add up.

This is where you start weighing whether it’s better to repair or replace your oven.

Should I do the oven repair or replace?

Weighing Costs: Should You Repair or Replace?

When deciding, it helps to compare repair costs with the price of a new oven. Most ovens range from $500 to over $2,500 for high-end models.

A good rule of thumb is the “50% rule”: if the repair cost is more than half the price of a new oven, replacing it might make more sense.

Other factors come into play, too. If your oven is still under warranty, repairs could cost you little to nothing.

On the other hand, if it’s over 10 years old and breaking down frequently, investing in a new appliance could save you money and frustration in the long run.

When Repairs Make Sense

Sometimes, oven repairs are the clear winner. If your oven is relatively new and the problem is minor, fixing it can save you money and get your appliance back to full function quickly.

Simple repairs, like replacing a heating element or fixing a thermostat, often come with a much lower price tag than buying a new oven.

Choosing to repair also helps reduce electronic waste, making it the eco-friendlier option. Extending the life of your current appliance can be a win for your wallet and the planet.

When Replacement is the Right Choice

On the flip side, there are situations where replacing your oven is the smarter decision.

If it breaks down regularly or has a major issue like a cracked interior or faulty control board, repairs might be a temporary fix that ends up costing more over time.

Older ovens, especially those lacking modern energy-efficient technology, can also rack up higher utility bills. By upgrading to a newer model, you’ll enjoy improved performance, advanced features, and long-term energy savings.

If your appliance is nearing the end of its expected lifespan, replacing it might give you peace of mind and better value overall.

A Tech Repair Inc Can Help You Decide

Still wondering about the best choice for your situation? Whether you’re leaning toward oven repair or replacement, A Tech Repair Inc. can help.

Our team specializes in diagnosing oven issues and guiding you through the decision-making process. With our expertise, you can feel confident about whether to fix your current appliance or invest in a new one.

Don’t let a faulty oven disrupt your life. Reach out to A Tech Repair Inc. today for a professional assessment and let us help you find the most cost-effective solution.